
TBD.
@Tweed game suggestion so he needs to provide the info.
We have a Steam curator now. You should be following it. https://store.steampowered.com/curator/44994899-RPGHQ/
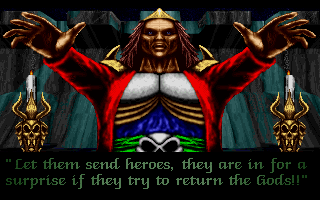
February: Hexx: Heresy of the Wizard
-
rusty_shackleford

- Site Admin
- Posts: 10602
- Joined: Feb 2, '23
- Gender: Watermelon
- Contact:

-
rusty_shackleford
- Site Admin
- Posts: 10602
- Joined: Feb 2, '23
- Gender: Watermelon
- Contact:
I might record footage of me playing this one if there's any interest, I guess.

https://www.mobygames.com/game/2042/hex ... he-wizard/
https://www.myabandonware.com/game/hexx ... wizard-2ui
I dabbled with this one a little, as in very freaking little. Strange blobber with auto combat. You pick four characters from a pre-designed group, everyone does magic to some degree but certain classes learn it faster and that's about all I know. I didn't get much farther than the first few rooms when I messed with it last year.


-
rusty_shackleford
- Site Admin
- Posts: 10602
- Joined: Feb 2, '23
- Gender: Watermelon
- Contact:
It seems to use midi audio, dunno if you can configure it to use soundblaster. My goto soundfont is CREATIVE_28MBGM.sf2, but I have no idea how to set one up on windows. The default windows soundfont is junk btw.
You can grab a copy here: https://datajake.braillescreen.net/500_ ... l_GM_Sets/
No idea if this game was made with it in mind but it sounds fine. A few audio cracks, not sure what's causing that. Something very heartfelt about this simple exit message:

Actually, running setup it seems to be made for Roland soundcards therefore I think a MT-32 soundfont is the appropriate choice.
I downloaded this MT-32-based(?) soundfont: https://www.hedsound.com/2019/06/mt32-c ... ryone.html
The small crackling is from the recording, didn't hear it while recording.
If anyone else knows more about soundfonts and wants to chip in, feel free to. I think both sound quite good, however.
Here's the rendered soundblaster version so I guess the MT-32 one is the correct soundfont:
Finally, with GUS audio. This was a pain in the ass to get working, and obviously not worth it. Higher quality than the soundblaster, but midi is significantly better.
You can grab a copy here: https://datajake.braillescreen.net/500_ ... l_GM_Sets/
No idea if this game was made with it in mind but it sounds fine. A few audio cracks, not sure what's causing that. Something very heartfelt about this simple exit message:
Actually, running setup it seems to be made for Roland soundcards therefore I think a MT-32 soundfont is the appropriate choice.
I downloaded this MT-32-based(?) soundfont: https://www.hedsound.com/2019/06/mt32-c ... ryone.html
The small crackling is from the recording, didn't hear it while recording.
If anyone else knows more about soundfonts and wants to chip in, feel free to. I think both sound quite good, however.
Here's the rendered soundblaster version so I guess the MT-32 one is the correct soundfont:
Finally, with GUS audio. This was a pain in the ass to get working, and obviously not worth it. Higher quality than the soundblaster, but midi is significantly better.
Last edited by rusty_shackleford on February 1st, 2024, 09:30, edited 1 time in total.


-
rusty_shackleford
- Site Admin
- Posts: 10602
- Joined: Feb 2, '23
- Gender: Watermelon
- Contact:
First impressions:
- Absolutely no idea what I'm doing.
- Wow, this has WASD movement?
- OK, time for the manual.


6000 cycles works well, not too fast, not too slow. Save before you try keys at the doors because you might drop them instead and then they'll be past the door you're trying to unlock. If you stand too close to enemies while trying to cast spells your shots will go past them. Terror is the most powerful spell in the game and I get the feeling I won't be able to cast anything else if I want to stay alive.
And if I'm right about terror then the most powerful party is probably warrior, warrior, assassin, assassin since running enemies have their backs turned to you and assassins can backstab from the back row.
And if I'm right about terror then the most powerful party is probably warrior, warrior, assassin, assassin since running enemies have their backs turned to you and assassins can backstab from the back row.
Last edited by Tweed on February 3rd, 2024, 07:15, edited 1 time in total.


Also, if you're trying to pick shit up, but can't you need the cursor to be low enough that it changes to the open hand icon and that's not based on item range, rather it's just the entire lowest section of the view window so you need to be really close to shit to grab it.
-
DagothGeas5

- Posts: 336
- Joined: Dec 13, '23
This reminds me of Arena, yet I do not recall that game to have this sort of lower/upper screen section-thing. Thank you for all the info! I was interested before, now I am even more curious to try it when I'll have the time <3Tweed wrote: ↑ February 3rd, 2024, 07:17Also, if you're trying to pick shit up, but can't you need the cursor to be low enough that it changes to the open hand icon and that's not based on item range, rather it's just the entire lowest section of the view window so you need to be really close to shit to grab it.
Last edited by DagothGeas5 on February 3rd, 2024, 11:37, edited 1 time in total.
Also highly recommend using CTRL-F1 to remap the Q and E keys to A and D so you can turn faster and remap S and X so that S actually makes you go backwards instead of moving forward really slowly.
Remember to switch back to whatever spell you want to use in combat before combat starts or you'll cast some really expensive spell three times and ruin your life. Also take note that your guys only seem to cast whatever spell is ready one time in combat and then go to weapons so if you want them to keep casting you need to pick them and right click, real brilliant.
Spells are very fucking expensive. Maybe this wizard had a point in locking up the gods considering how much they charge for magic.
Terror and Confuse continue to be the only way to keep from dying. They start throwing tons of shit at you early.
Spells are very fucking expensive. Maybe this wizard had a point in locking up the gods considering how much they charge for magic.
Terror and Confuse continue to be the only way to keep from dying. They start throwing tons of shit at you early.
Last edited by Tweed on February 4th, 2024, 08:14, edited 1 time in total.

My dudes are are level 3, moving close to 4. Antimage seems to be useful, think it saved my ass on the first fight where you have to drop down a pit into a room full of enemy casters. Regen is valuable, supposedly brings dead characters back, but I haven't let anyone die since dead heroes don't get XP. Made my night wizard take trueview, supposedly lets you see fake walls and also gives full light, can't see a reason why you'd want to learn the torch spell or waste torches if you can cast that.
Confuse and terror, confuse and terror your guts!
Confuse and terror, confuse and terror your guts!

Was interested in the game, but by no having character creations and having "press random buttons" puzzle in the first minute, lost the interet.
Bros are level 4, Wizeye is useless, lets you look beyond walls, but nothing else, no real point of that.

There is character creation. You use a separate program in the same directory.WaterMage wrote: ↑ February 6th, 2024, 06:41Was interested in the game, but by no having character creations and having "press random buttons" puzzle in the first minute, lost the interet.
And I think I softlocked the game by using up all my common keys and not buying anymore.
-
rusty_shackleford
- Site Admin
- Posts: 10602
- Joined: Feb 2, '23
- Gender: Watermelon
- Contact:
start over, noob.
I don't see you playing it.
-
rusty_shackleford
- Site Admin
- Posts: 10602
- Joined: Feb 2, '23
- Gender: Watermelon
- Contact:
I'm waiting for you guys to find all the progress stoppers for me.Tweed wrote: ↑ February 6th, 2024, 10:27I don't see you playing it.

Another month, another game abandoned within a week.

-
rusty_shackleford
- Site Admin
- Posts: 10602
- Joined: Feb 2, '23
- Gender: Watermelon
- Contact:
Tips I found online:
- DO NOT EVER throw away the two gems (red and blue) you get after beating the first God's Tower.
- after using them in the second God's Tower TAKE THEM with you
- ALWAYS keep them in your backpack
- beware of the missing common keys bug! Workaround is posted @ Underdogs in the Comments section.
- during battles ALWAYS keep the Ethblade spell casted, A L W A Y S. Your characters have to have their left hand empty for this spell to work, I never kept anything in the left hand slot.
- Antimagic, Deflect spells are your friends
- HEAL during battles using HEALING or RENEW.
- monsters not only do not respawn but they also do not regenerate. If you have problems with some tough encounter back up one level, heal and go back down to finish the fight.
- the DEADLY LEVEL OF GREEN FIREBALLS in third God's Tower is beatable. Hide away in safe corners, heal, and push on.
- you can kill the last boss BEFORE you set him free, makes the final challenge much easier (he is SUPER fast).
Last edited by rusty_shackleford on February 6th, 2024, 12:00, edited 1 time in total.
-
rusty_shackleford
- Site Admin
- Posts: 10602
- Joined: Feb 2, '23
- Gender: Watermelon
- Contact:
I found a cluebook, it was in one of those big cluebook compilations:
Hexx: Heresy of the Wizard
==========================
This review and walkthrough originally appeared in
["QuestBusters' The Book of Clues 2"](http://mocagh.org/hintbook/bookofclues2.pdf), by Shay Addams.
The walkthrough is credited to "Clancy Shaffer & Fred Philipp."
Typos such as "Shaspouk" and "Xtlaltic" are in the original.
---------------------------------------------------------------------------
- Type: Fantasy Role-playing
- System: IBM (Required: 386/20+, 800 free EMS, 256-color VGA/MCGA, Microsoft compatible mouse. Supports: Sound Blaster, Ad Lib, Roland LAPC & SCC1, Gravis Ultra)
- Company: Psygnosis
In this European import, you direct the actions of a quartet
of adventurers on a quest to discover four magic games and
replace them in a tower. The quest is lengthy, consisting
of exploring mazes where you push buttons to alter the
structure and open new doors or remove blocked passages.
These feats are accomplished by finding keys, unlocking
doors, and pushing buttons to get into the next area —
where you start looking for more keys. Unlike most
American games, HEXX does not employ first-person graphics that
show the game through the eyes of your party. Instead, you see an
isometric view that depicts them from overhead view at an oblique angle.
An auto-map helps significantly, and the Regeneration Chamber for reviving dead characters
will see a lot of use. A novel "Restore Game" feature shows a picture of the scene
where you saved each game, making it easier to load the one you want. While the
magic spells and combat can be fun, the repetitive nature of the "puzzles," which
consist mainly of finding keys and pushing buttons, put a hex on HEXX's chance of
getting more than a nod from this reviewer.
The Solution
============
General
-------
In most instances you carry only one key at a time, so you know what to do next:
find the door that the key you are carrying will unlock.
To progress through each level, push all the buttons and pull all levers you find,
then check your map to see what has changed: you will usually see that a path or
wall has been opened, or an obstacle has been moved out of your way.
Characters & Gear
-----------------
Use two Mages: Mad Meg, who has Confuse from the outset, and later can cast
Wychwind and Mindrage, and Zothen Runecaster, who can cast Damage.
You also need Two Warriors up front to keep the monsters away from the Mages.
Get a bow and arrows for the rear characters, who can do real damage with
the Hail of Doom-type arrows from a Harvester bow (with Archer skill the
damage is about 450).
Swords range from a short sword to a Rune sword, and the battle Staff
can be wielded from the rear rank; the best armor is Crystal Plate.
There are a number of Magic rings, staffs and wands, but you will need a
Recharge spell to regenerate them after about seven uses. But if you sell
them to a shop and repurchase them, they will be fully charged.
There is a Regeneration Chamber in the southwest section of Level 6, where
you start; a bed is in the lower left center.
There are also two shops on this level, selling armor, weapons, food,
scrolls and potions.
Helpful Hints
-------------
Sleeping in beds will restore Hit Points and Magic Points to the maximum,
and also gives you an opportunity to buy magic spells.
Regeneration Chambers will return your Hit Points to the maximum,
but not your Magic Points.
Shops sell armor, weapons, food, torches, rings, amulets, potions and spells
(there are no Shops outside of the Keep, so stock up on lots of food and
torches before leaving the Keep to enter the structures.
Alternatively, you can use the Torch spell (if you have it) to provide light.
Travelling & Keys
-----------------
Backpacks will hold up to twelve items, but only count as one item in your
inventory slots.
Each Monster you slay will drop a bag of gold and sometimes a key; you must
also buy or find "Common Keys" to unlock "Common Doors".
Pile common keys together to save space.
Throughout this quest you will constantly be going up a level, then down,
then up, then down, and so on. The important thing is to cover all areas
on all Levels in your search for keys. Consult your map frequently.
The Keep
--------
You begin in the Keep on Level 6, where the initial objective is to reach the
center of this level and find four Teleport Pads, which will transport you to
other areas of this level, including the stairs down to Level 5.
Eventually you must progress down to Level 1 and back up to Level 6, until
you have mapped all areas except for two: in the northwest corner of Level 6
is a room with four openings in the wall, where you will place the artifacts
you acquire.
The other area you will not have yet mapped is on Level 4, where you will
encounter four locked gates leading to the four main structures that you must
enter in order to obtain the four artifacts necessary to completing the game.
Mapping all of the Keep in this linear manner will eventually result in the
acquisition of a key that unlocks the gate to the first of these structures,
the one to the north, which leads to Grisslem's Tower.
Level Six
---------
Look at your automap and explore this level until all five switches appear
on the map:
Switch 1 is to the north.
Switch 2 is in the southeast, facing a column that bars your path.
Switch 3 is in the southeast.
Switch 4 is in the middle western side of the map.
Switch 5 is south of Switch 4.
Go north to Switch 1 (watch out for the teleportal just north) and pull the red switch.
This causes the column in the southeast to face north.
Go to Switch 5 and push the gray button, which removes the column and allows access to Switch 2.
Push the green button, which rotates Switch 4.
Go to Switch 3 and pull the red lever, which allows you to reach Switch 4.
Pull the green lever.
Go west to the teleport pad, which takes you north to the Ruby Key
Step back on the pad to leave the area.
Go northeast opposite the shop, use the Ruby Key and get the Sun key.
Level Five
----------
Go to Level 5 and through the west door.
Go down the Hall and get a Crystal Key.
To deal with the monsters just released, run down the hall and exit, then
turn and fight them (close the door if you need some time to heal).
As you work your way down, you will have to move back and forth between
floors to make progress; watch out for Spinners.
The Gems
--------
After you get each Gem, return to Level 6 and place it in a pocket.
This opens a door further west and allows you to proceed to another Tower.
On the last trip, take all four Gems back to the Wizard's Tower.
The Eye doubles your strength while being carried and renews the entire party when placed in the wall.
The Tear doubles dexterity and restores magic points.
The Heart doubles constitution and restores vitality.
The Horn doubles intelligence and Vivifies the party.
Stonewalled
-----------
To get past the stone wall on Level 6, you must find a key on Level 5, which
will open the rest of Level 6's northwest section.
Next work your way to Level 1, then back up to Level 5 and open the
stairway to Level 6.
Go back down to Level 4, then go north to the entrance to the Tower of Grisslem.
The Tower of Grisslem
---------------------
Start up the east stairs of this eight-level tower.
Get the Eye from the north-central wall on Level 8.
Go back down to Level 7 and drop down into the pit to reach Level 6
(there is a regeneration chamber on this floor) .
Look for a blue button in the southeast corner, then use the steps from
Level 6 to reach Level 5.
Descend to Level 4 by going north via the spinner.
Go east and south, then enter the south pit to reach Level 3
(a pit in the south on Level 3 will take you to Level 1).
Use the teleportal to return to Level 4 of the Keep.
Go to the southeast corner and take the steps to Level 5.
Go to Level 6, then head west and put the Eye in the proper hole, which will open a door to the west.
Take the door to the south, and you will find a key that opens the next tower.
Go south on Level 4, open the door with the night key and use the teleportal
in the south to reach the Demesne of Shaspouk.
The Demesne of Shaspouk
-----------------------
Go south and up to Level 2 (you'll find an Armorer and a magic shop on
this level).
Visit every part of Level 2, then go north and use the west hall to get
to the stairs on Level 3.
On Level 3, cover every square foot completely, then go to the southeast
corner and take the two sets of stairs to Level 4.
On Level 4, a spinner teleports you back to where you started: when you go
north, try to move to one tile away from the north wall.
When you see a sign, run the Gauntlet: use the pads one at a time and kill
each monster as it appears.
In the south alcove, press button one (between the second and third projection)
to open the east door and reach the stairs to Level 5 (there is a Regeneration
Chamber on Level 5).
The stairs up are in a room in the northeast area: cover the whole floor for keys.
On Level 6, explore the floor, then take the stairs in the southeast quadrant
to Level 7.
Using the Night Key from Level 6, go to the northeast comer and push the blue
button behind the fake wall.
Go to the southwest comer and go through another fake wall, then go west,
north and east and get the Tear.
Use the steps down to Level 6, and go to Level 5 via the pit in the central-east room.
Take the steps to Level 4, then go around west and north, then south to
the stairs that lead to Level 3.
Use the pit in the center to reach Level 2, and take the steps to Level 1.
Teleport back to Level 6 of the Keep and place the Tear in the slot.
Go west and south to get the Ruby Key.
Go to Level 4, use the Ruby Key in the south room and use the teleport to get to the Citadel of Angrath.
The Citadel of Angrath
----------------------
Take the steps to Level 2, a tough level with numerous fake walls and spinners.
Cover the entire floor, get the Ruby Key from the center room, then go to the northwest
quadrant and use the key on the west side to get to the stairs that lead to Level 3.
On Level 3, get the Gold Key that opens the southwest corner and leads to the stairs up.
On Level 4, get the Ruby Key in the small north-central room.
With the Ruby Key, go north, west and south to reach the stairs to Level 5.
On Level 5, use Antimage to counteract the Arcbolts; some squares here will
remove your spell, so you can die often.
Find the safe squares (save the game when you discover one), recast the spell
and heal yourselves, then move on.
Go to the northwest, then east and south for the stairs to Level 6.
On Level 6, the stairs up are in the northwest.
In the center of Level 7 are two sets of stairs on the left and right: use either one.
On Level 8, use the Ruby Key to get the Heart.
Return to Level 1, use the teleport on 2, then return to Level 6 and put the
Heart in its slot. Go west for the Sun key, which opens the Tower of Xtlaltic.
The Tower of Xtlaltic
---------------------
Use the Sun Key to enter and clear out the south room, then use the teleport to Level 1.
Now work your way up to Level 7, in search of the Horn.
On Level 2 you will need Levitate spells; also watch out for spinners.
You'll find a shop and a Regeneration Chamber on Level 2.
Move to the southwest to take the stairs up to Level 3, where you will need a Sun Key.
Go south and west to the stairs up to Level 4, then on to Level 5.
Return to Level 4 via the pit, take another pit back to Level 3, then
another pit to Level 2 and back up to Level 5 and Level 6.
Save the game.
Drop down into the pit.
Cast Levitate, and while passing a green button, press it
(this removes a column to the north on Level 4).
Go north to Level 4 and get the Ruby Key.
Go down the pit to Level 3, cancel Levitate and go south to the steps down
to Level 2 (you can also find a good weapon north of here) .
Go back to Level 5 via the southwest steps and go down the pit to Level 4.
Go north and down the pit to Level 3.
Save the game.
The Horn
--------
On Level 3, go to the northwest room and move up and down levels between
this room and one in the northwest on the Level 6.
Save the game, then use the left teleport pad to go up to Level 6.
Step on the pad in front of the blue button, step off and back on again,
push the blue button and step off again.
Push red button and step to the teleport pad in back, which transports
you to Level 3.
Use the right teleport pad again to reach Level 6, then push the green
button and go to the rear teleport pad, Level 3.
Step on the left teleport pad and go to Level 6.
Push the green button and use the rear pad on Level 3.
Use the right teleport (Level 6), then press the red button and get
the Night Key out of the room in back of you.
Step on the pad in front of the blue button, step off, then step on
and off again.
Step on the rear teleport pad to reach Level 3, then step on the center
teleport pad and teleport to the exit hall.
Press the blue button to create a second blue button; press this,
and you are arrive on Level 6.
Go to Level 5 and use the pit to reach Level 4.
Use the pits or stairs to reach Level 2.
The Horn at Last
----------------
Go up the stairs to Level 3 and use the Sun Key.
Finish visiting every part of this level (take the steps down in the northeast
area to completely finish it, particularly the southeast part).
Then use the stairs to reach Level 4.
Explore Level 4, noting the pit in the northwest, which you will use later.
Go northeast and take the stairs to Level 5, which is filled with spinners on
this floor.
Find the Ruby Key, then go south of it for the Night key.
Go south through a fake wall and use the Ruby Key on the door.
Move east to a pad on front of a door; the pad rotates the door.
Step on the pad, then off and on, until you are able to go west through the door.
Then go south and east to another pad, which revolves the door you just came
through: stand on it until you can go south.
Return to this door and get the Sun Key, then use it to the north and get the Gold Key.
Go to the second pad, near the southeast corner, and stand on it three times, so that the
room where you got Sun Key revolves from to south to west access.
Use the Gold Key on the west door, and you'll find stairs to Level 6.
On Level 6, you must go to the northeast corner to find stairs to Level 7.
Go south and drop through a pit to Level 6.
Go south on Level 6 through two doors, then east and get the Sun and Silver Keys.
Use the Silver Key to open a door to the southeast, and again go up to Level 7.
Just west of the stairs is a Sun Key, and to the west, a yellow button.
Press the yellow button to remove a pillar to the north, then go there and use the Sun Key.
Press the yellow button to the east.
Use the second Sun Key to open a door to the northwest room, then press the
yellow button there (this opens the door to the center).
Return to the back of the column and press yet another yellow button, which
removes a teleport pad from in front of the Horn.
Take the Horn.
Into the Wizard's Tower
-----------------------
Descend into the pit on the west side to reach Level 6.
In the east part of the central area, enter the pit to Level 5.
Take the northeast stairs to Level 4.
In the northeast room on Level 4 are two pits: use the southern one to
reach Level 3.
Take the south steps to Level 2, then the east steps to Level 1 (you must use
the Crystal Key to get out).
Take the Horn to Level 6 and insert it into the slot, which opens the way
to the Wizard's Tower.
Take all four items before leaving Level 6.
None Shall Pass
---------------
Note the teleport pad you arrive on: if you want to leave the building
you can do so at any time.
You must get to the southeast corner, then proceed north to reach the steps
to Level 2. In the center is a sign: "None shall pass."
Use the pit just to the south to finish up Level 1, then return by using
the steps in the northwest.
Pull the red lever south of you, which gives access to the room in the center.
Open the west door with the Ruby Key.
Stand on the pad, and it will remove the pit you used before and replace it
with a pad.
Standing on the new pad opens door to the east, where you must pull a red lever.
Move west and south, then go north to the stairs up to Level 3.
Go to the stairs in the north-central area of Level 3 to reach Level 5.
Four Columns
------------
On Level 5, find the Silver key and use it on the west door.
Continue west and open all doors (one leads to a healing chamber).
Go east, open the north door and slay anything that moves.
In the center are four columns: put the Tear in the south column.
Stay close to the walls and go east, where you will put the Heart,
then go north and west to the west column and place the Horn in this column.
Open the door behind you, go north and place the Eye in the north column.
(You must place the items in the order described.)
When you place the Eye, it removes a column north of you: step on either pad
here, and it will send you into the center room to fight the toughest monster
of all.
If you need to escape and heal, stand on the west teleport pad, which
creates a teleport pad to the west; standing on the west one creates a
pad to the north; standing on the north one creates another to the south
that will teleport you out.
When ready to leave, press the button in the northwest room.
You must kill the monster to finish the quest.
Orbs & Stuff
------------
Because the keys are found in such a linear manner that is noted in the solution,
their locations are not listed here.
Object | See this Section for Location | Also See Section(s)
------------------------------------------------------------
Eye | Tower of Grisslem | The Gems
Tear | The Demesne of Shaspouk | The Gems, Four Columns
Heart | The Citadel of Angrath | The Gems, Four Columns
Horn | The Horn | The Gems, The Tower of Xtlaltic, Into the Wizard's Tower, Four Columns
Last edited by rusty_shackleford on February 6th, 2024, 12:02, edited 1 time in total.


Ooh reminds me of Grimrock & Shining The Holy Ark, I'll have to come back to this.
Month is almost over boy oh boy I sure hope they pick a playable game next month!
-
WhiteShark

- Turtle

- Posts: 2124
- Joined: Feb 2, '23
It wouldn't be much of an adventure if it were easy, pansy. These games are for the boldest of the bold, only.Vergil wrote: ↑ February 25th, 2024, 04:18Month is almost over boy oh boy I sure hope they pick a playable game next month!
Then why did this thread completely die less than a week in?WhiteShark wrote: ↑ February 25th, 2024, 05:01It wouldn't be much of an adventure if it were easy, pansy. These games are for the boldest of the bold, only.Vergil wrote: ↑ February 25th, 2024, 04:18Month is almost over boy oh boy I sure hope they pick a playable game next month!
-
WhiteShark
- Turtle
- Posts: 2124
- Joined: Feb 2, '23
Because @Watser is still recharging the boldness he expended on previous adventures.