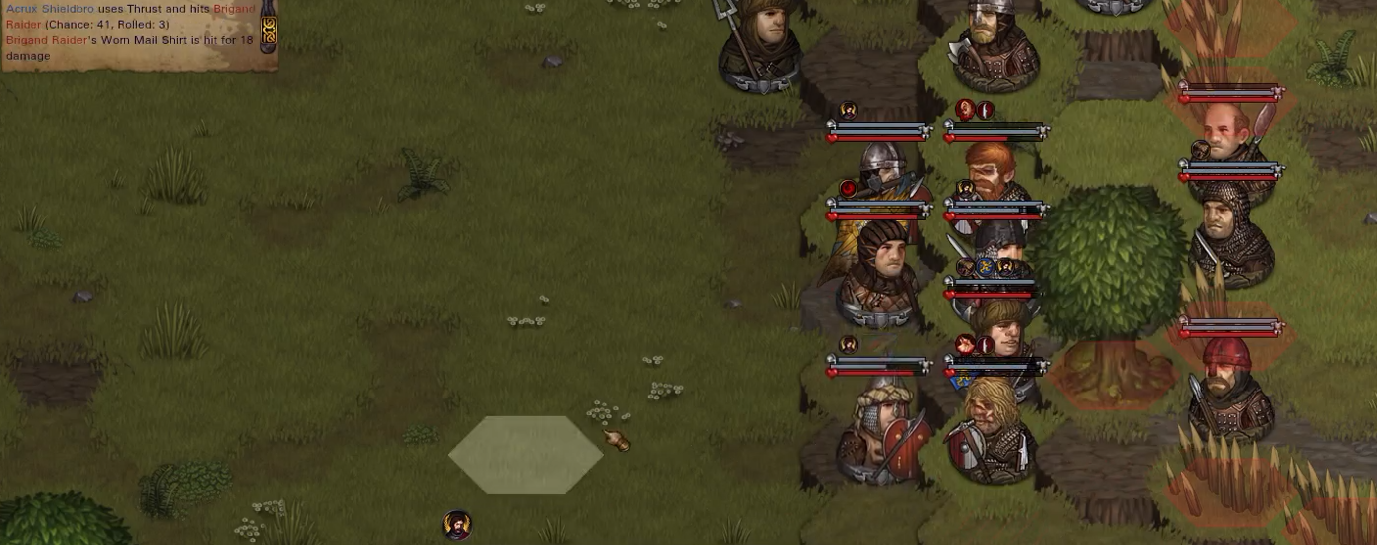
Two seconds later

These guys were actually headed for the Peasant group behind us, but luckily we got pulled into the fight because of proximity. Which also means we'll have a hefty helping of
meatsack shields volunteer heroes to help us
pad our payout keep the roads safe from brigandry

.

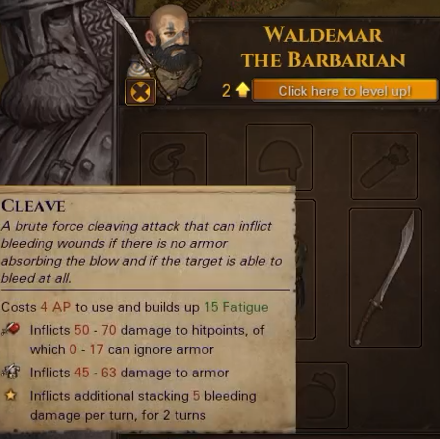
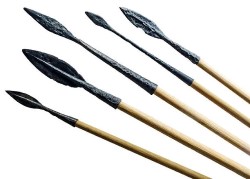
Thralls are the peons of the northern barbarians. Their weapons hit hard and they have lots of stamina, but they have no or **** armor and they don't fight very intelligently. Their favored tactic is a suicidal charge, occasionally popping Adrenaline Rush for an alpha strike.

: Hold steady, men. That includes the caravan. This chaff is nothing compared to our last fight. Let them come to their dea-

: ...that also works, actually. The Turtles will fight to the last peasant
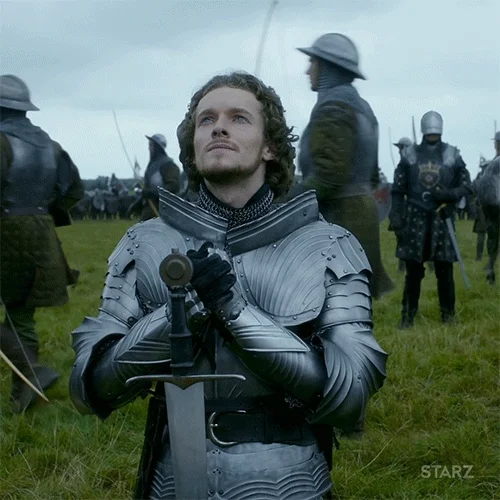
HAUBERK! Let's give those thralls something to think about, shall we?

: <breathing deeply and slowly>

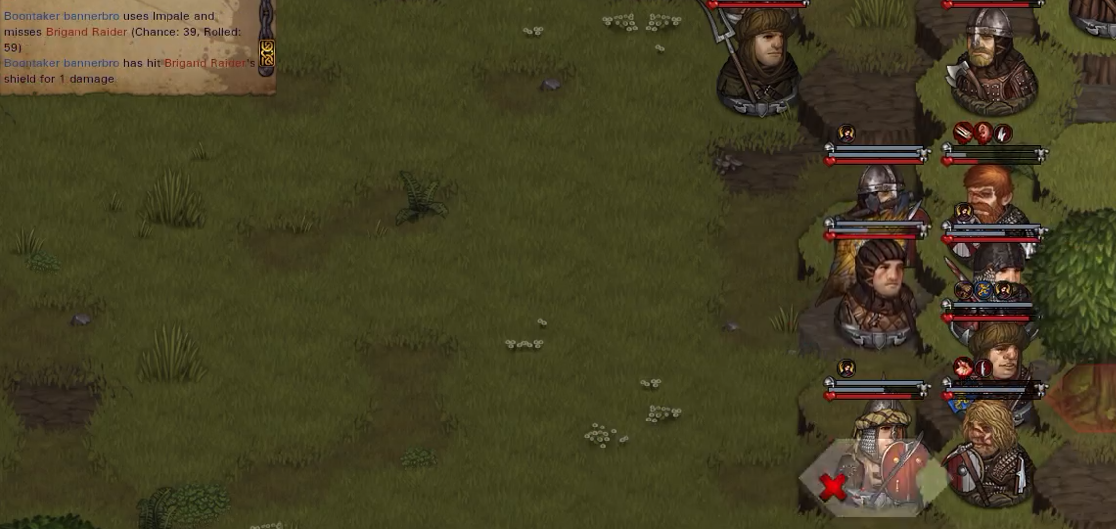
I couldn't show it because the combat log doesn't expand automatically and I constantly forget to do it manually to start a battle, but Hauberk lands two Quick Shots on the Thrall and murders him. Impressive for his still-low Ranged skill.

: YEAAAAAAAAH!

: Axe-throwers? Nein.

: Hold fast on the back rank! Let the front-rankers move in to engage and make room for us. Our time will come.
The Turtles do exactly that. Whiteshark flanks the northern thrall and whiffs on his one attack. Not a problem, he's fulfilled his task of pinning down that side of the line, and his defense is so high he'll be close to impossible to dislodge or ignore. Acrux quick-marches through Whiteshark to foul up the javeliner. Finally, Kalarion completes the advance and finishes the job Gerey began:
: Axe-thrower? NEIN!

: Fodder, Oyster, on me.
Boontaker steps forward and thrusts the standard into the hand of the Thrall that survived Kal's Split. Oyster scores a glancing hit that nevertheless destroys his target's ****** armor.

: Snicka-SNACK, gon' poke that SNATCH!
The miscellaneous peasants and guards close the round out by finishing the full engagement of the Thralls, including forming a wall around the only Thrall to threaten Hauberk, allowing him freedom to continue firing and maneuvering. One of the guards opens round 2 in impressive fashion:

Meanwhile, the seriously injured Thrall from last round gives as good as he got, murdering one of the peasants who charged forward so
stupidly BRAVELY! last round:

Gerey closes out the injured Thrall's life with a slash, then moves south to help keep the spear-wielding Thrall tangled up.
...Aaaaaaaaaaaaand Boontaker lands another headshot, dropping the last front-line Thrall on the top of the fight to Fleeing state.
: <exaggerated yawn> Too easy. Let's wrap this up boys.
Hauberk kills the Thrall that tried to close with him.
: thanks, plebs!
Peasants: HOORAY!
Oystersauce steps forward and finishes the job on the fleeing Thrall up top. If this is sounding like an absolute massacre, well...
: God I love the small of dead Thrall in the morning
Acrux then pulls off the impressive feat of smashing the forehead of the last Thrall standing up top, following up with a final thrust that kills him dead:


: They will learn to fear us, my Captain.
: They will indeed. Well done, Acrux!
The final round opens with the last Thrall venting his dying anger on one of the caravan guards, imitating Acrux with a headshot followed by a body pierce that kills his target. Boontaker steps forward with an impaling thrust that smashes through the Thrall's lung. Gerey finishes the fight.
Loot is nothing to write home about, but Hauberk and Gerey both ding.
: Pack it up. CARAVAN! Let's get on the road, we've still got a long trip ahead of us. We'll take a pit-stop in Reinbruch.
Reinbruch is currently suffering from Ambushed Trade Routes. We can't do anything about it right now (typically we can pick up a contract to cure it, but not while we're otherwise occupied). We take full advantage of the situation, offloading all our junk loot for elevated prices.
At this point, Kalarion remembers:

:

: MAIDENHAVER!

: <limping up> Food?
: No. Better.
Maidenhaver's eyes light up with glee.
: Hello, my lovely! I've been waiting for you! Oh yes, yes, you'll be replaced eventually but right now you're the only one for me! C'mere you lovely... <limps away crooning softly>
: ...it keeps happening

Whiteshark gets a new helmet:


: Iron without. Iron within... yes.
Kalarion goes to the town square to see who's available for hire. Not much to write home about, but we do get one pleasant surprise:

I'm trying to find someone who can go over to Codex, and ask Reinhardt if he wants to come take a bro. No luck so far, but if he does I'll come back and hire him for us.
Time to head out. Onward!

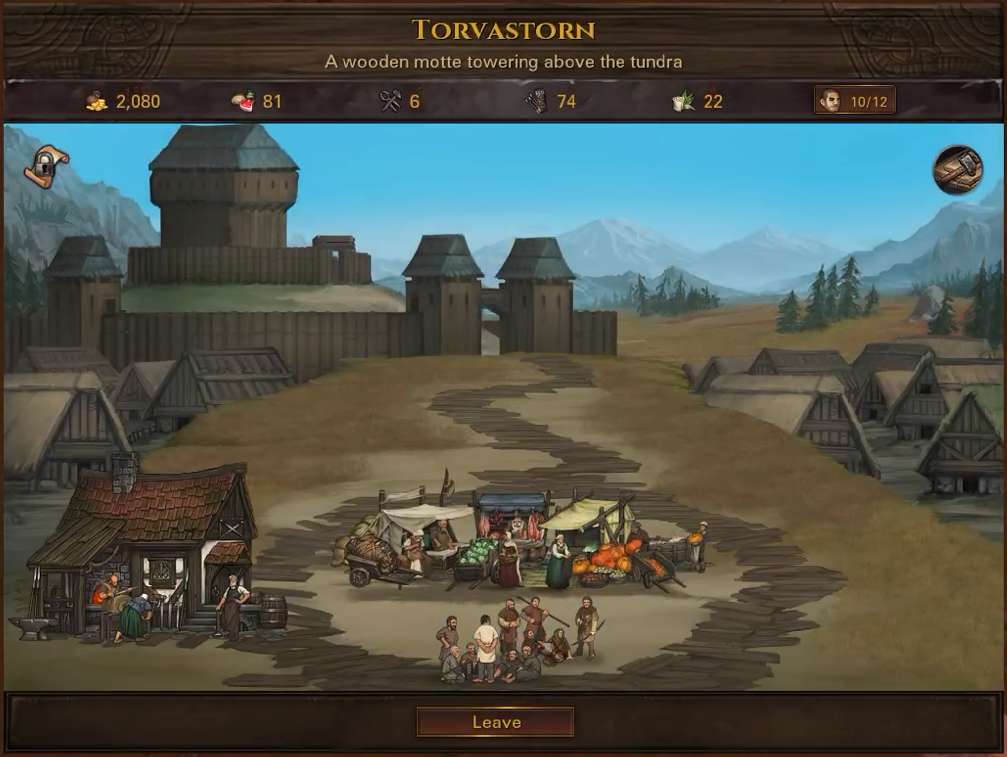
We encounter a few small groups of banditos along the route to Torvastorn, but none of them want a piece of us. We take a stop in Torvastorn just on the edge of dusk (after which shops and the town square would be empty):
Kalarion decides to take a look at available hires.

There are a couple good prospects here. Kalarion especially has his eye on the dirt-cheap Caravan Guard and Wildman.
: Alright, let's see what we've got here. Fingers crossed...
@Nemesis: "
a high-damage sword-and-board swordsman."

: You won't regret this sir. I have extensive experience with the blade!

...wow. Holy ****. This looks to me like just about as perfect a lower-class build as possible for what Nemesis wants. Nice!
: Next!
@Eyestabber: "
a frontline 2H Sword user wearing heavy armor."

: Just back from the whorehouse. Ask me anything.

: ...***
: It can't be! asf?! Never thought I'd see you here.

Another minor jackpot! Melee skill could have started a tad higher but still good, and look at those talent stars! Turtlebros, I don't feel so- NO WAIT I FEEL FANTASTIC
And with that, for the first time, the company is at full strength.
: Alright boys, go get your kit from Boontaker over there, and get ready to march out. We're in the middle of a job. Welcome aboard.
Nemesis gets the scimitar that's been burning a hole in our inventory for yea! these many days, along with the Sipar shield. Eyestabber stays as is for now. We move out and finish the final leg of the route without further incident:

:


:

Kalarion strolls around Hafnarsholm, seeing what the town has to offer:
That building in the bottom left is a kennel. We can buy pets of various sorts here, including hounds and war hounds (can be released in battle to fight alongside the bros) and hawks (can be released to give a huge view of the map in battle). We don't have much use for it now. In the bottom right is a fletcher, where high-class bows and crossbows, and their ammunition, are sold.
In the weaponsmith we can see a demonstration of why Well-Supplied (and by extension, caravan contracts to citadels and big cities) is highly sought-after in the endgame:

The chance for Famed items to show up skyrockets, and in some cases (such as this) multiple Famed items may appear. Famed items are one of this game's equivalents of magic items (true magical items in this game are something like legendary/artifact items in other games). We can see here a famed dagger and a polemace:

Obviously they're far out of our ability to buy right now, but later...
A little more equipment shuffling is in order. Oystersauce ditches his warfork in exchange for Maidenhaver's old Goedendag (the massive +20% bonus to hit will help him a lot until we can get him to 75+ Melee skill), and Eyestabber gets the warfork. We buy a body armor for Eyestabber as well. Finally, we restock on food and tools. All that done, and no contracts available in Hafnarsholm (Citadels only give out Noble contracts), we start the long trip back to Reinbruch.
: Boontaker, give the men a marching song.
: Yessir. Alright men, after me!
A yellow bird! With a yellow bill!
Was standing on! My windowsill!
I lured him in! With a piece of bread!
And then I smashed! His little head!
:

(more marching cadences available on request

)
Just outside Reinbruch we encounter another small group of Reavers:

: Time to reave the Reavers
Bring them down, men!
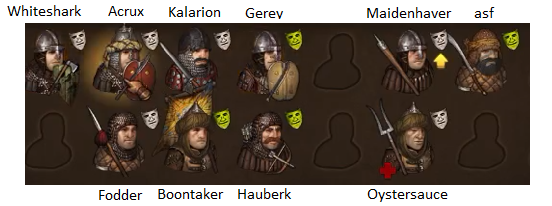
Here's what our party looks like right now (keep in mind that both Maidenhaver and asf are still in the reserves, their injuries are some of the worst you can suffer and take a loooooooooooooong time to heal when untreated by the Sisters):


: Men! Take the hill!
: CHAAAARGE!
: Not that hill you moron! The one behind us! By Anselm, you'd think I hadn't taught you anything. Always let the enemy come to you if you can help it.
: <scarlet> Yes sir. RETREEEEEEEEA-
: SHUT UP! ...Men, move to the top of the hill behind us. Let's force these Reavers to us.
: Aye!
Everyone moves into position as ordered, and we're in a pretty good spot to start round 2:

As round 3 opens we're comfortably in position at the top of our hill, and the Reavers are charging below us as predicted. So far no battle has been joined. Hauberk let off a Quick Shot during round 2 but missed by a mile. The round has us jockeying for position, bringing the north contingent down to turtle up as the Reavers attempt to climb the hill to the south. The final Reaver pops Adrenaline, obviously intending to rush forward and hold the top of the hill to allow his friends up:

The shield Reaver climbs as predicted and whiffs his one attack on Gerey's shield. Unfortunately the next Reaver to climb the hill in the teeth of the Turtles has more luck, getting off a successful Batter on Oystersauce that puts him in a terrible position:

: Hnnng! Sheeeeeeeeit! I better get a visit to the SISTUHS outta this.
(asf would of course call him a *** here but asf is back in the wagons)
:
***!
asf calls him a *** anyways.
The good news is that Oystersauce was positioned such that he can only take attacks from one enemy at a time, and doing so places the Reaver right next to a leering Kalarion. Meanwhile, the mace-wielding Reaver rushes to the top of the hill through the shield Reaver, again as predicted. He's now breathing down Fodder's neck. Gerey has a rare total whiff against the mace Reaver, making Fodder's position even more precarious. Then, the axe-thrower lands BOTH throws, uphill, on Oystersauce!

Note Oyster's Nine Lives kicking in. That undoubtedly saved him from getting dropped right then and there.
Both Fodder's Repel and Boontaker's attack also miss the mace Reaver. Not good at all. Eyestabber lands a shot at the Reaver who hurt Oyster so badly, but just damages armor for now. Nemesis moves south to help deal with the mace Reaver. Oyster himself gets some revenge with a massive headshot:

: You like dat *****?! I got more where dat- hrrk
There is not, in fact, more where that came from.
Acrux lands both hits, but his light spear barely damages the Reaver threatening Oyster. Hauberk follows suit with a pair of whiffs on the mace Reaver from point-blank range. Thankfully, Kalarion takes care of Oyster's problem:

: Thanks massuh. I ain't feelin too good...
: Get back and stay back. You're out of this one. Move.
Kalarion steps in front of Oyster, then Whiteshark calmly advances forward, shields up, to deal with the incoming 2h Hammer Reaver.
The shield Reaver Adrenaline Rushes AGAIN. He opens the next round with a double shield bash on Gerey, pushing him down the hill and closer to the axe-thrower (I think if the first shield bash hit the Reaver would have walked up on Fodder):

Boontaker lands a solid hit on the mace Reaver, destroying his armor. But it won't be much help stopping him from attacking Fodder...
The axe-thrower whiffs two shots attempting to finish Oyster off. Then it's mace Reaver's turn. Everyone holds their breath as Fodder stares death in the eyes:

: WHAT?!
Reavers: WHAT?!
Mace Reaver: ...what? I hate shields!
The AI in Battle Brothers is designed to very occasionally take completely random actions, representing the mayhem of battle producing unpredictable results. This is one of those times apparently.
: You ************! I loved that shield!

: Mein Schwert-bruder!

With the mace Reaver dead, Fodder lands a shot on the shield Reaver. It doesn't do much but it's a start. The round closes with Gerey moving back into position, pinning the shield Reaver in place once again. The axe-thrower, now hefting a cleaver, charges up the hill to take the mace Reaver's spot. It's a good position but he has no AP left, and is now open to about a dozen attacks. Fodder starts the party with a poke that takes about half the Reaver's body armor.
Meanwhile, Whiteshark calmly smashes his axe into the hammer Reaver's armor, significantly damaging it. Then it's shields up, daring the Reaver to strike.
: Iron within!
Acrux and Kalarion both land hits, nearly destroying the hammer Reaver's armor but not significantly harming him. Hauberk finally lands an Aimed shot at the cleaver Reaver, doing ****-all. Boontaker, on the other hand, has returned to form:

Nemesis finishes him off with a Swipe.
: <spitting> Northern scum. To the catacombs with you!
Eyestabber steps forward but misses the shield Reaver. Boontaker pops another hit on the hammer Reaver, nearly killing him. Incredibly, the hammer Reaver goes after the one bro with sky-high defense and shields up:

: Iron without! I AM THE SHIELD OF MY BROTHERS!
: Whiteshark? You sound...
: Look to your foe, sir captain.
: What is...?
Fodder and Nemesis both whiff on the shield Reaver. Gerey finishes the job as usual, followed by Kalarion taking Whiteshark's advice. The battle is over. No dings and the loot is nothing to write home about.
: What was that back there, Whiteshark?
: All will be made clear in time, lord.
: Lord? What? I'm a hedge knight you idiot, what are you talking about?
: Thou art as I said, though thou know it not, MY LORD.
: ...I haven't got time for this. Keep that, "my lord", **** to yourself. I'd rather not start swinging from some Noble's gibbet because he thinks I'm getting ideas above my station.
: By thy command.
: <muttering> I hated jousting. I have to remember that. I never wanted to go back. This is what I wanted. Yeah. Now I have thee's and thou's. Yeah...
Oystersauce gets put in the reserves. There's another barbarian party nearby but Kalarion doesn't want anything to do with them right now. The Turtles limp into Reinbruch. They're still suffering from Ambushed Trade Routes, and now Disappearing Villagers. There's a 2- and 3-star contract. Time to clean this place up. Well... maybe not the 3-star. We'll see
.
The 2-star is a camp clearing. Kalarion takes it immediately.

: Consider your problem solved.
: Are you sure sir? We've got three men in the wagons...
: This will be easy money, you'll see.
The payout on a contract is a good indication of how difficult it is. At full combat strength, anything below 1000 crowns is generally going to be a cakewalk. At 690 crowns, we're likely fine, even down 3 bros.

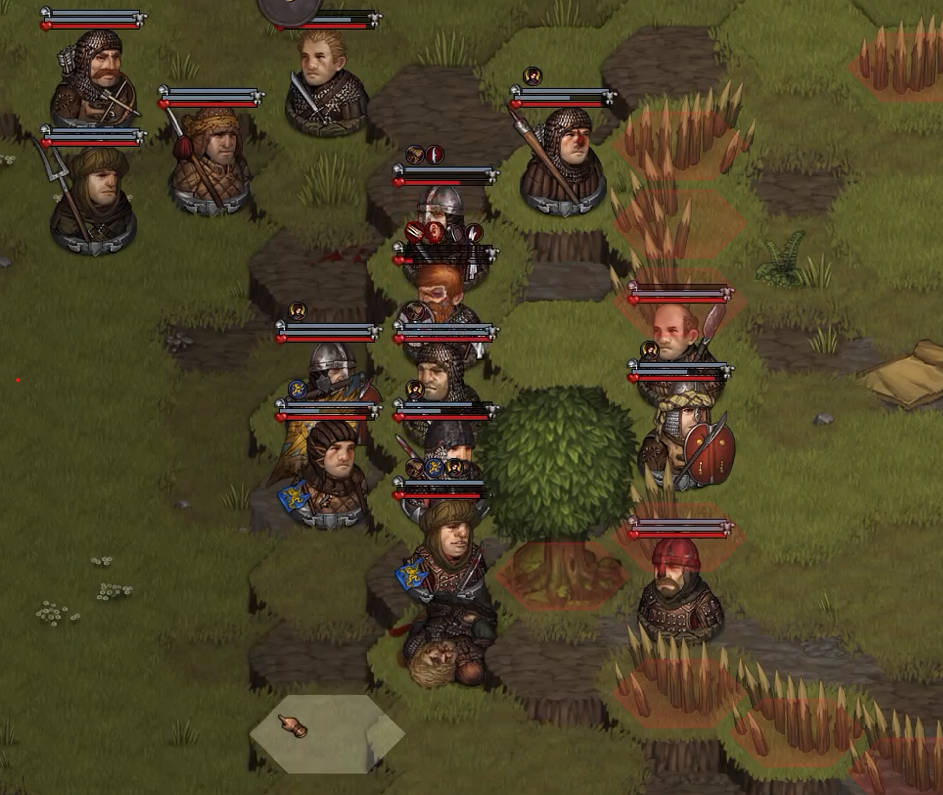
We head straight over. This fight looks pretty straightforward:

The fight begins with all Raiders charging forward, allowing us to set our battle lines at leisure. Whiteshark anchors the south, while Nemesis and Acrux hold the north. The polearms all move north. The intent is that all of them will concentrate on the longsword holder until he's taken out. We don't want to risk a bunch of massive hits, at least not until our armor is better. Most of our attacks this round miss, with the exception of a poke from Acrux and Fodder that take a chunk out of the longsword Raider.
The next round:

The hammer raider quickly switches to a Pilum (a type of javelin that can be used to do a high-damage Split Shield) and throws it at Acrux. Luckily it misses. The two Raiders in the rear of their line move forward on the south. One of the sword-and-board Raiders is now in a position to threaten Hauberk next round, we'll have to do something about him and soon. In the meantime, Whiteshark should have no problem holding the other two.
Then the longsword Raider imitates Kalarion.
Raider: time to foign

: Agh! By doze!
: What did you say?!
: ...by doze?
: Not you. YOU! WHAT DID YOU SAY?!
Raider: jealous you're fighting someone who can actually use his blade, joustling?
: Foigning is a knight's honor! You'll pay for your-
 Raider
: Nah
: RRRRRRRRRRRGAAAAAAAAAAAAAH!
Most of the round is pretty boring, with the Turtles doing minor or no damage. Towards the end, Fodder headshots the Raider that the longsword Raider rotated with, gashing his neck and bringing him dangerously low on HP. Meanwhile the hammer Raider up top lands a shot on Nemesis, destroying his armor (hammers do massive armor damage) but not much else. Eyestabber smashes the same Raider Fodder did, bringing him to within an inch of his life:

Whiteshark lands a clutch shot on his target with a mere 15% chance to hit, heavily damaging the Raider's armor. Meanwhile, Acrux manages to finish off the badly-wounded Raider up top. Now only Kalarion is left in this round. He's so furious he actually tries to walk forward through ZOC, but the spear Raider pokes him and keeps him in place. Kalarion's retaliating Swing misses handily.
: HRRRRRRRRRRRRRRRRRRRRRNG!
Raider: you seem to have some kind of digestive issue, joustling
Round 3 opens with the axe Raider walking into Hauberk's face. Boontaker misses his shot, leaving the axe Raider in a dangerous position next round. Gerey meanwhile continues cooly slicing apart the spear Raider's body armor, hitting twice. It might seem like not much was accomplished, but swords are absolutely deadly against bare flesh. The spear Raider is in trouble:

Eyestabber kills the top Raider, and then starts moving south to support Hauberk.
: I'b cubbing, boys!
: <snigger>
: SHUD UB!
The longsword Raider amazingly switches to a Pilum and throws it at Eyestabber! He misses handily.
Raider: ****!
Whiteshark lands another clutch shot! The Raider's armor is now completely destroyed (although Whiteshark still has very low hit chance, especially vs. a shielded Raider). Kalarion is completely useless at this point, so frothing mad that he can't direct the fight, and missing left and right.
: Sir! SIR! ****. Nemesis! Acrux! Get down there and help Hauberk, now!
They do:

The axe Raider behaves as expected, swinging at Hauberk. Luckily he only lands one shot, but it's enough to destroy Hauberk's armor. Boontaker misses
again. Then the sword-and-board Raider steps up and:

: <clutching his shoulder> AUGH!
: Oyster! Rota- ****!
Taking a look around, the longsword Raider sees the lay of the land and understands how the wind is blowing.
Raider: Time to go. Toodles, joustling! Another time maybe!
Fodder lands another shot on the spear Raider, dropping him to almost nothing and opening the hope Gerey can finish him off. Unfortunately he has an extremely rare round of whiffs. The spear Raider lives on.
: Back off. BACK OFF I said.

Meanwhile the sword-and-board Raider lands two minor shots on Whiteshark. Annoying but not much else. Acrux then enacts phase 2 of the shieldbros' plan.
: Get BACK.

Hauberk is free to back away! Acrux and Nemesis have managed to push both threatening Raiders off, an absolutely stellar teamwork maneuver considering their low chance to connect with Shield Bash. Acrux follows up by stepping in front of Hauberk, completing the rescue. Hauberk stumbles behind Boontaker and Fodder to finish the round.
Boontaker opens the round with yet another miss! He steps south to support Acrux and Whiteshark. The axe Raider lands two shots on Acrux, severely damaging his armor but not yet seriously threatening him.
The longsword Raider, smelling blood in the water with Hauberk, charges forward. Guess who he's next to now:

Fodder takes immediate advantage, smashing his spear into the longsword Raider's ribs and causing both top Raiders to panic. The tide has turned firmly in the Turtles' favor. Then sword-and-board steps up to Acrux and:

: nnnng!
: Acrux!
Eyestabber finishes off the longsword Raider. Kalarion is still so furious he's not even paying attention to Acrux yet.
: HE WAS MINE, WHOREFUCKER!
: BAY ADDENZION, 'ETARD!
: ...what?
Hauberk fires a couple feeble shots but predictably misses both. Gerey finishes the last Raider up top and then rushes to Acrux.
: Shield up Acrux! DEIN SCHILD, STANDHAFT!
Acrux raises his shield. Nemesis tries a shot on the sword-and-board Raider but misses. Kalarion, finally seeing Acrux's situation, rushes south and gets tangled up with Whiteshark's target. Whiteshark misses again. He's completely blown by the new, heavy armor he's wearing and only gets a single swing off.
Round 6 opens in a grim position, with Boontaker continuing to miss in his panicked attempts to aid Acrux:

The axe Raider steps up to Acrux, who is steadily holding his shield up. He grins evilly. He swings.

: ACRUUUUUUUUUUUUUUUUUUUUUUUUUUUUUUUUUUUUUX!
: NO!
The other bros are thrown into disarray as Acrux crumples to the ground. Nemesis takes a massive shot from the sword-and-board Raider, nearly killing him and slashing open his arm to the shoulder. Fodder continues pulling clutch duty, landing another Impale on Acrux's killer. Eyestabber unfortunately misses his attack. Then Kalarion, thrown into cold focus by recent events, decides he's had enough.
: You are blocking my way.

Kalarion steps close to the axe Raider, breathing heavily, eyes ablaze. Whiteshark quietly moves into position in front of Fodder. Nemesis swings feebly at the sword-and-board Raider, missing both. Yet, it is Boontaker who finally regains his fabled skill:

: DIE.
Eyestabber drives his warfork through the cheek of the sword-and-board Raider, followed by Gerey landing a clutch slash that sends him into a panic. Kalarion moves deliberately to the Raider's other side. There's no way out. The Turtles take turns poking at him, and finally Nemesis ends his torment with another beheading:

Kalarion rushes to Acrux's side.
: Steady, old man. You're not dead yet. We've got our medical supplies, the Sisters will see you patched up in no time.
: <slowly craning his head at Whiteshark> does he... know?
: <shakes his head no>
: <turning back to Kalarion> I would have walked with you, my Captain. To the end. I would have liked to see-
He coughs up a massive gout of blood.
: ...goodbye, old cripple. You held fast to the end. Standhaft, indeed.


We took a ton of new injuries in that fight, including Hauberk's Split Shoulder, which takes forever to heal and is crippling. He goes straight to the reserves.
Oystersauce's ding gets taken care of:

He chose Recover for his 5th level perk, so we'll hold off on his chosen surname for now.
The Turtles troop silently to Reinbruch. Ambushed Trade Routes is healed, and we take our gold. While he's there the mayor offers Kalarion the 3-star, which turns out to be a hunt:

: I'll think on it.
The Turtles move outside town. They bury Acrux in silence. After a minute of standing quietly around his grave, Kalarion steps forward.
: Here lies Acrux. He was with us since the beginning. 14 battles he fought, and nine men and beasts he slew. He was old, a cripple, not much to look at to the rest of the world. But he was a Turtle, and he held fast to the end. We pay our respects, and we will honor his memory.
: We're done here. Boontaker, move the men back to town, we have work to do. Eyestabber!
: Chief?
: That *******'s longsword is yours. Use it to slaughter scum like he was.
: They will bleed. My word.
: Let's go.


 : ...
: ...


 Anselm shows me favor.